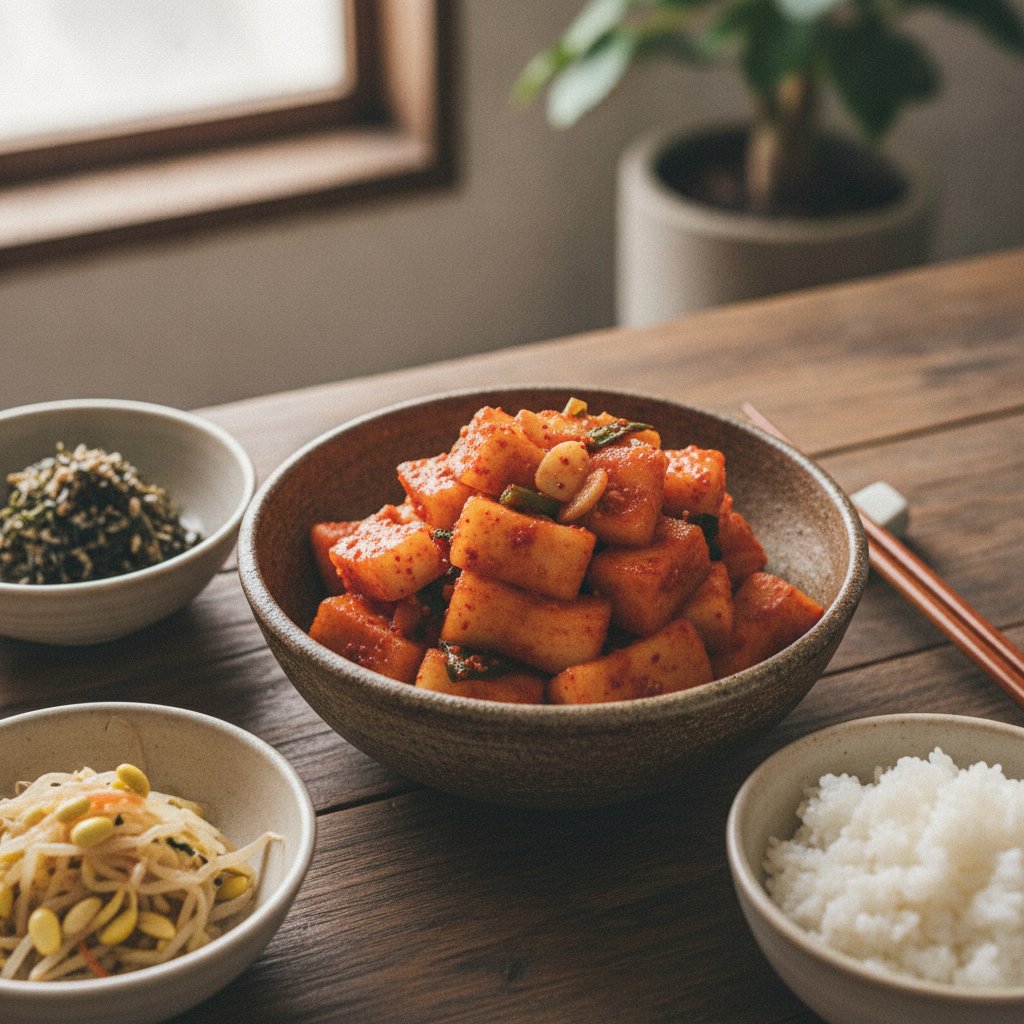
Easy Kkakdugi Recipe (Quick Radish Cube Kimchi)
This post contains affiliate links. As an Amazon Associate, we earn from qualifying purchases at no extra cost to you.
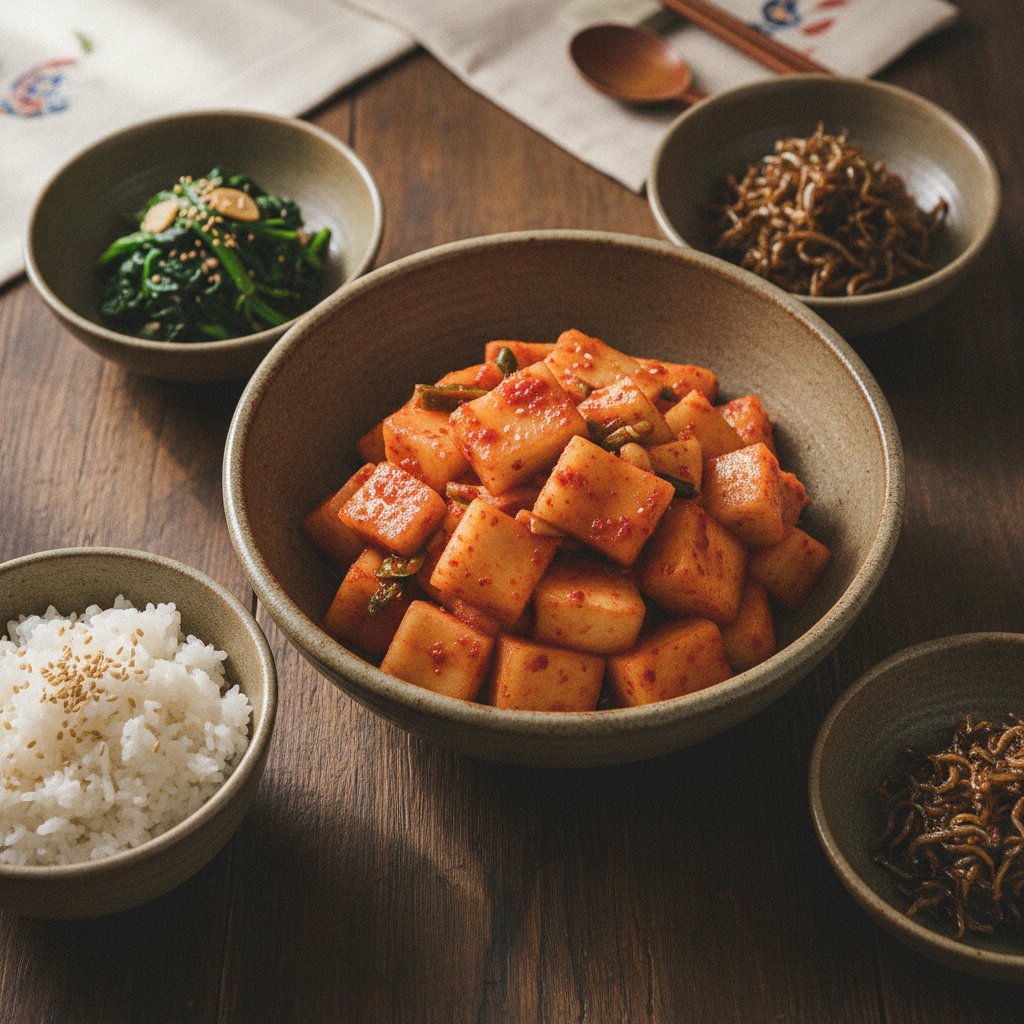
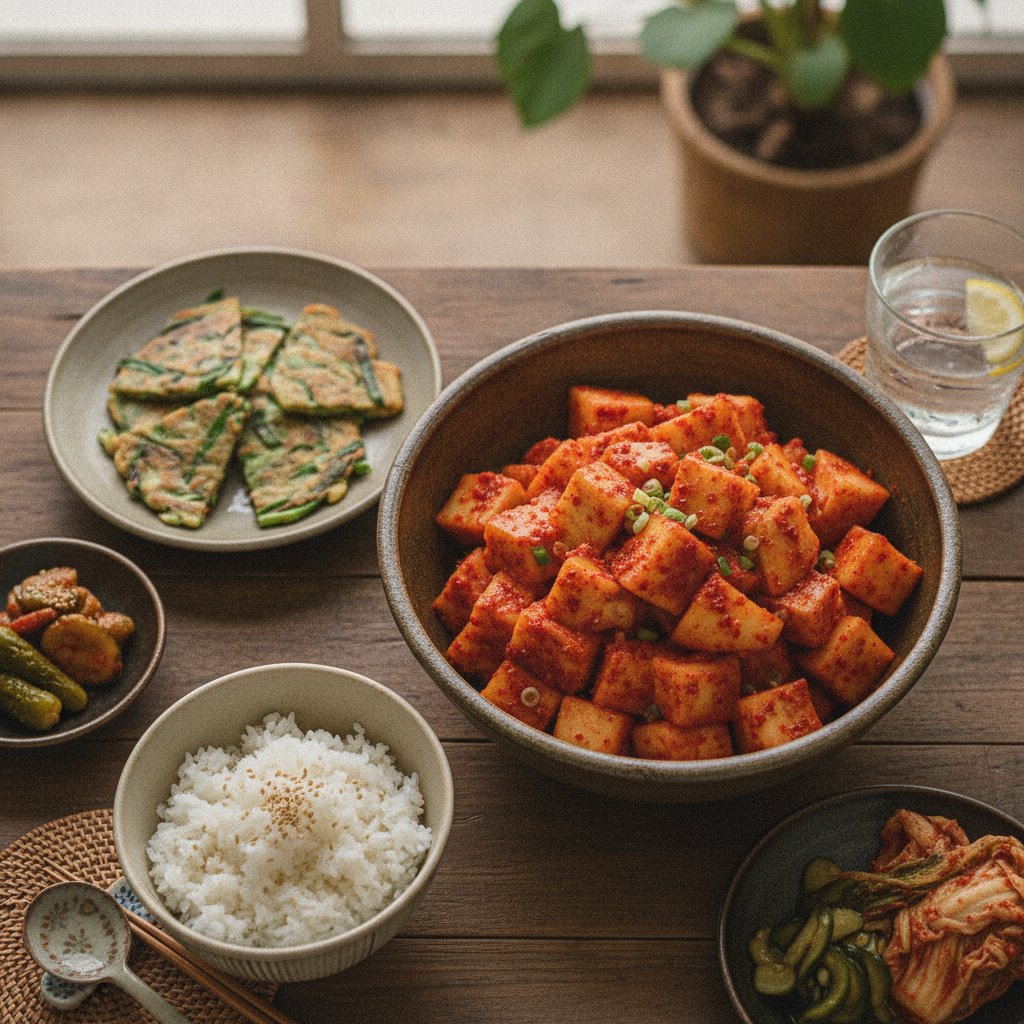
Whenever my mother made a steaming pot of seollongtang (ox bone soup) on chilly evenings in Seoul, a freshly packed jar of kkakdugi (radish cube kimchi) always sat right in the center of our dining table. While making traditional baechu kimchi (napa cabbage kimchi) required an entire weekend of intense labor during kimjang (the annual late-autumn kimchi-making season), kkakdugi was the fast, joyful side dish she could slice together in under an hour. She would slice through thick Korean radishes on her wooden cutting board with a steady thunk-thunk-thunk, tossing the gleaming white cubes into a large porcelain basin with salt and sugar. Within just a couple of days, we had a spicy, tangy, and impossibly crunchy condiment ready to lift any meal.
If you are intimidated by traditional fermented foods, this easy kkakdugi recipe is the absolute best entry point into Korean home cooking. Unlike cabbage kimchi, which requires meticulous rinsing and spreading paste between every individual leaf, radish cube kimchi is delightfully straightforward: you simply peel, cube, salt, and toss. The natural sugars in winter radish respond beautifully to a quick cure, yielding a crisp texture that holds up for weeks in the fridge.
Why This Works
- Dual-action salting draw: Combining coarse salt with a small amount of sugar during the preliminary cure pulls out bitter surface water quickly while reinforcing the cell walls, ensuring a satisfyingly loud crunch in every bite.
- Dry-powder color coating: Tossing the drained radish cubes directly with dry gochugaru (Korean red pepper flakes) before introducing the wet aromatic paste stains the radish a rich, deep crimson that stays locked on the vegetable rather than sliding off into the brine.
- Quick starch binding paste: A brief slurry made from cooked white rice or rice flour creates an adhesive base that helps garlic, ginger, and savory fish sauce cling tightly to the smooth, slippery radish cubes.
Ingredients
- 1 kg (about 2.2 lbs) Korean radish (mu) or Daikon radish, peeled
- 2 tbsp (30 g) coarse sea salt or Kosher salt
- 2 tbsp (25 g) granulated white sugar
- 4 tbsp (30 g) gochugaru (Korean red pepper flakes)
- 2 tbsp (30 ml) fish sauce (myulchi aekjeot or standard Asian fish sauce)
- 1 tbsp (15 ml) saeujeot (salted fermented shrimp), finely minced (optional)
- 5 cloves garlic, finely minced (about 1.5 tbsp)
- 1 tsp (5 g) fresh ginger, grated
- 4 green onions (scallions), cut into 2.5 cm (1 inch) pieces
- 1 tbsp (15 g) cooked white rice, blended with 2 tbsp water (or 1 tbsp glutinous rice flour simmered in 4 tbsp water until sticky)
Substitutions
Korean radish (mu) is round, firm, and dense with a pale green top and a distinctly sweet, pepper-fresh flavor. If you cannot locate Korean radish at your local Asian market, standard Daikon radish works as a very close alternative. Because Daikon contains a bit more moisture and has a slightly softer texture, reduce your salting time by about ten minutes so it does not lose its structural bite. If you are vegetarian or cannot find saeujeot (salted fermented shrimp), leave it out entirely and add an extra tablespoon of fish sauce or replace both with Korean Yondu vegetable seasoning or light soy sauce to retain that essential savory base. Do not substitute regular chili powder or cayenne pepper for gochugaru; true gochugaru is coarsely ground, mildly spicy, and slightly smoky, which gives kimchi its signature flavor without overwhelming heat.
🛒 Easy Kkakdugi Recipe
As an Amazon Associate we earn from qualifying purchases.
Shop Ingredients & Tools →How to Make It
- Slice and cube the radish: Wash and peel 1 kg (about 2.2 lbs) of radish. Cut the radish into uniform slabs roughly 2 cm (3/4 inch) thick, then slice those slabs into clean, even cubes. Keeping the pieces uniform in size ensures that every cube cures at the exact same speed and absorbs seasoning evenly throughout the batch.
- Cure with salt and sugar: Place the cubed radish into a broad mixing bowl. Sprinkle 2 tbsp coarse salt and 2 tbsp sugar evenly over top. Toss thoroughly with clean hands to coat every side. Let the bowl sit undisturbed at room temperature for 30 to 40 minutes. You will notice clear liquid pooling at the bottom of the bowl as the salt draws out excess water through osmosis, while the sugar tempers any raw, mustard-like sharpness in the radish.
- Blend the starter paste: While the radish cures, prepare the aromatic binder. Blend 1 tbsp of cooked cold white rice with 2 tbsp water using a small food processor or mortar until smooth. In a small bowl, mix this rice slurry together with 2 tbsp fish sauce, 1 tbsp minced saeujeot, minced garlic, and grated ginger. The cooked starch provides easy food for beneficial lactic acid bacteria, encouraging a smooth and stable fermentation process.
- Drain without rinsing: Strain the cured radish cubes through a colander to discard all the pooled liquid. Do not rinse the radish under fresh tap water. Rinsing strips away the balanced sweet and salty seasoning layer that has settled into the outer flesh of the radish. Simply shake the colander gently and let it drain for 5 minutes.
- Coat with red pepper flakes: Transfer the drained radish cubes back into your clean bowl. Sprinkle 4 tbsp of gochugaru directly onto the bare radish. Put on kitchen gloves and rub the pepper flakes firmly into the radish for 1 to 2 minutes. The coarse pepper flakes will absorb remaining surface moisture and stain the white cubes a brilliant red, creating an ideal texture for the rest of the paste to adhere to.
- Combine with aromatics and scallions: Pour the rice-garlic paste into the bowl and add the chopped green onions. Toss everything together vigorously until the paste coats every single cube in a glossy, thick layer. Taste one cube now; it should taste noticeably saltier and more intense than finished kimchi, as the radish will release a bit more interior juice over the coming days to dilute the paste naturally.
- Pack firmly into a storage container: Transfer the coated radish cubes into a clean glass mason jar or dedicated kimchi container. Press the cubes down firmly with your fist or a large spoon as you layer them, pushing out any trapped air pockets. Oxygen encourages unwanted mold, so keeping the radish compacted tightly is crucial. Leave at least 3 to 4 cm (1.5 inches) of empty space at the very top of the jar because the kimchi will produce bubbles and expand as it ferments.
Tips from a Korean Kitchen
In traditional Korean homes, success with simple recipes relies heavily on small adjustments and sensory observation rather than rigid timers. Always select radishes that feel heavy and dense for their size with tight, unwrinkled skin. A light radish often indicates a dry, pithy interior that will turn soft and spongy during fermentation rather than staying crisp.
When fermenting at home, manage your ambient kitchen temperature carefully. Leave your sealed jar on the kitchen counter out of direct sunlight for 24 to 48 hours. You will know primary fermentation has begun when small air bubbles begin creeping up through the red sauce along the sides of the glass, and opening the lid releases a pleasant, faintly sour, garlicky aroma. As soon as you see these signs, press the radish cubes down under the surface juice once more and move the jar straight to the refrigerator. Cold fermentation in the fridge slows down acid production, giving the flavors time to mature into a mellow, complex side dish over two to three weeks.
Storage
Store your kkakdugi in the coldest area of your refrigerator, ideally between 1–3°C (34–37°F). During the first 3 to 5 days in the fridge, it will taste fresh, sweet, and lightly spiced. Between weeks two and four, it reaches peak tangy flavor. By week six, the radish will taste very sour and sharp—this well-fermented stage is highly prized in Korea for cooking! Use older, sour kkakdugi to make fried rice, or simmer it into a hearty kimchi jjigae (kimchi stew). Never freeze radish kimchi; freezing destroys the delicate water-retaining plant cells, leaving you with limp, rubbery radish cubes upon thawing.
🛒 Easy Kkakdugi Recipe
As an Amazon Associate we earn from qualifying purchases.
Shop Ingredients & Tools →FAQ
Can I make kkakdugi without fish sauce or shrimp?
Yes, you can easily make a delicious vegan version. Replace the fish sauce and salted shrimp with 2 tablespoons of regular soy sauce or Yondu vegetable seasoning, plus a pinch of extra salt. Adding half a teaspoon of kelp powder or dried mushroom powder into the paste will restore the deep umami flavor normally provided by fermented seafood.
Why did my kimchi jar fill up with so much liquid?
This is a completely normal part of the process. As the radish ferments and absorbs salt, it naturally sheds interior juices, creating a rich kimchi brine (kkakdugi gukmul). Do not drain this liquid off! The liquid protects the radish from air exposure and acts as an incredible liquid seasoning to drizzle over warm bowls of rice or noodle soups.
How do I know if my kkakdugi has gone bad?
Fermented foods naturally carry a pungent, sour, and sharp aroma that is completely safe. However, if you see fuzzy white, green, or black mold growing on top of the liquid line, or if the radish smells rotten rather than pleasantly sour, discard the batch. Keeping your radish cubes pressed down beneath the top brine level prevents surface mold from forming.
More Korean Recipes
- Creamy Korean Corn Cheese (콘치즈)
- Gyeran Jjim (Korean Steamed Eggs): Always Fluffy
- Jangjorim Recipe: Authentic Korean Soy-Braised Beef and Eggs
- Eomuk Bokkeum (Stir-Fried Fish Cakes): Your New Favorite Lunchbox Side Dish
🛒 Easy Kkakdugi Recipe
As an Amazon Associate we earn from qualifying purchases.
Shop Ingredients & Tools →